Install Let’s Encrypt SSL Certificate to Secure Apache on RHEL/CentOS 7/6

Requirements
A registered domain name with valid A records to point back to your server public IP Address.
Apache server installed with SSL module enabled and Virtual Hosting enabled in case you’re hosting multiple domains or subdomains.
Step 1: Install Apache Web Server
1. If not already installed, httpd daemon can be installed by issuing the below command:
2. In order for Let’s encrypt software to work with Apache, assure that the SSL/TLS module is installed by issuing the command below:
3. Finally, start Apache server with the following command:
Step 2: Install Let’s Encrypt SSL Certificate
4. The simplest method of installing Let’s Encrypt client is by cloning github repository in your filesystem. To install git on your system you must enable Epel repositories with the following command.
5. Once Epel repos are added in your system, go ahead and install git client by running the command below:
6. Now , once you have installed all the required dependencies in order to deal with Let’s Encrypt, go to
/usr/local/ directory and start pulling the Let’s Encrypt client form its official github repository with the following command:Step 3: Obtain a Free Let’s Encrypt SSL Certificate for Apache
7. The process of obtaining a free Let’s Encrypt Certificate for Apache is automated for CentOS/RHEL thanks to the apache plugin.
Let’s run Let’s Encrypt script command in order to obtain a SSL Certificate. Go to Let’s Encrypt installation directory from
/usr/local/letsencrypt and run the letsencrypt-auto command by providing --apache option and the -d flag for every subdomain you need a certificate.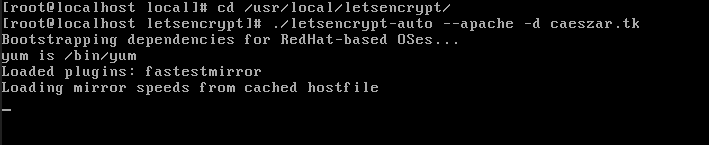
Create Lets Encrypt SSL Certificate for Apache
8. Supply the email address that will be used by Let’s Encrypt to recover your lost key or for urgent notices and press Enter to continue.
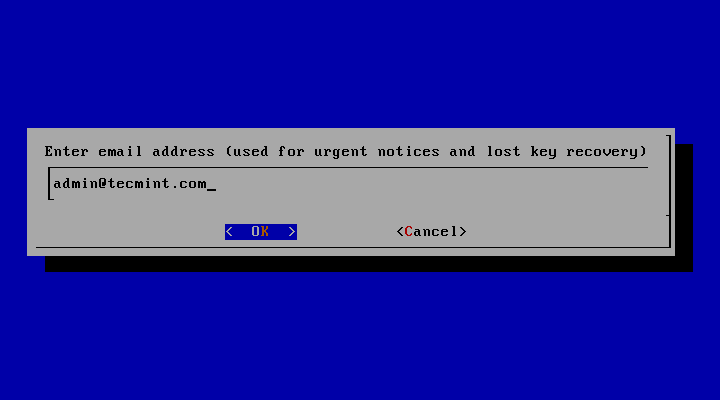
Add Email Address for Lets Encrypt
9. Agree the terms of the license by hitting Enter key.
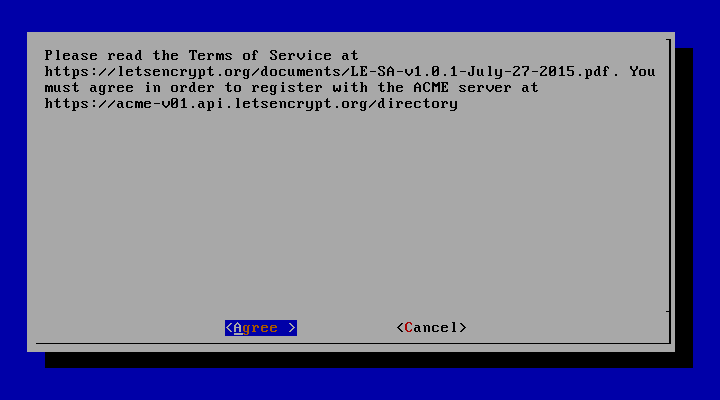
Agree Lets Encrypt License
10. On CentOS/RHEL, by default, Apache server does not use the concept of separating directories for enabled hosts from available (inactive) hosts as Debian based distribution do.
Also, virtual hosting is disabled by default. The Apache statement which specifies the name of the server (ServerName) it’s not present on SSL configuration file.
To activate this directive, Let’s Encrypt will prompt you to select a virtual host. Because it does not find any Vhost available, select the
ssl.conf file to be automatically modified by Let’s Encrypt client and press Enter to continue.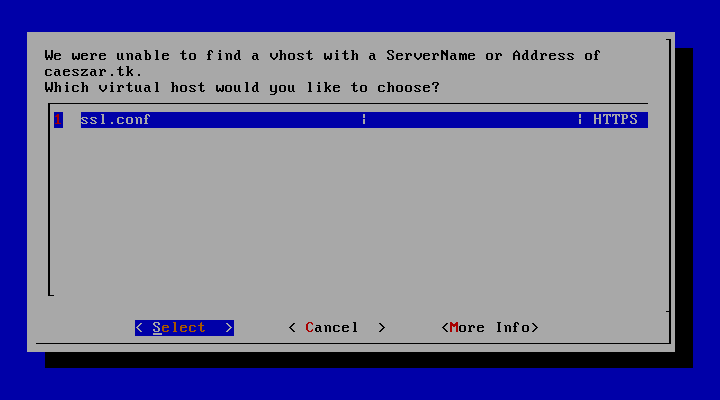
Active VirtualHost Directive and Select Mod_SSL
11. Next, choose the Easy method for HTTP requests and press Enter to move forward.
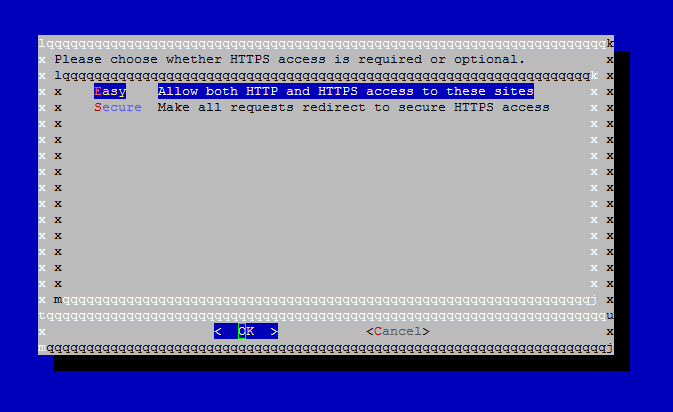
Allow Easy HTTP Requests
12. Finally, if everything went smooth, a congratulation message should be displayed on the screen. Press Enter to release the prompt.
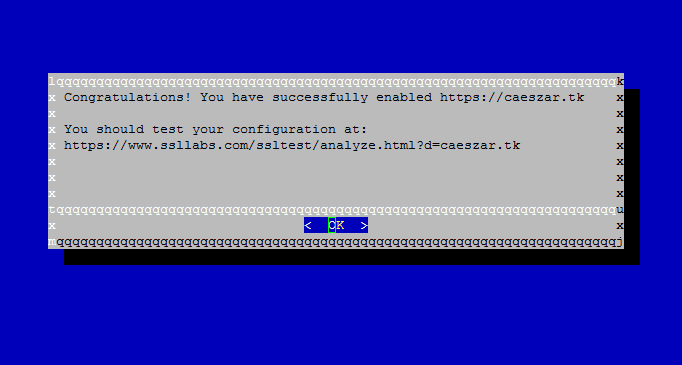
Lets Encrypt Enabled on Domain
That’s it! You have successfully issued a SSL/TLS certificate for your domain. Now you can start browsing your website using HTTPS protocol.
Step 4: Test Free Let’s Encrypt Encryption on Domain
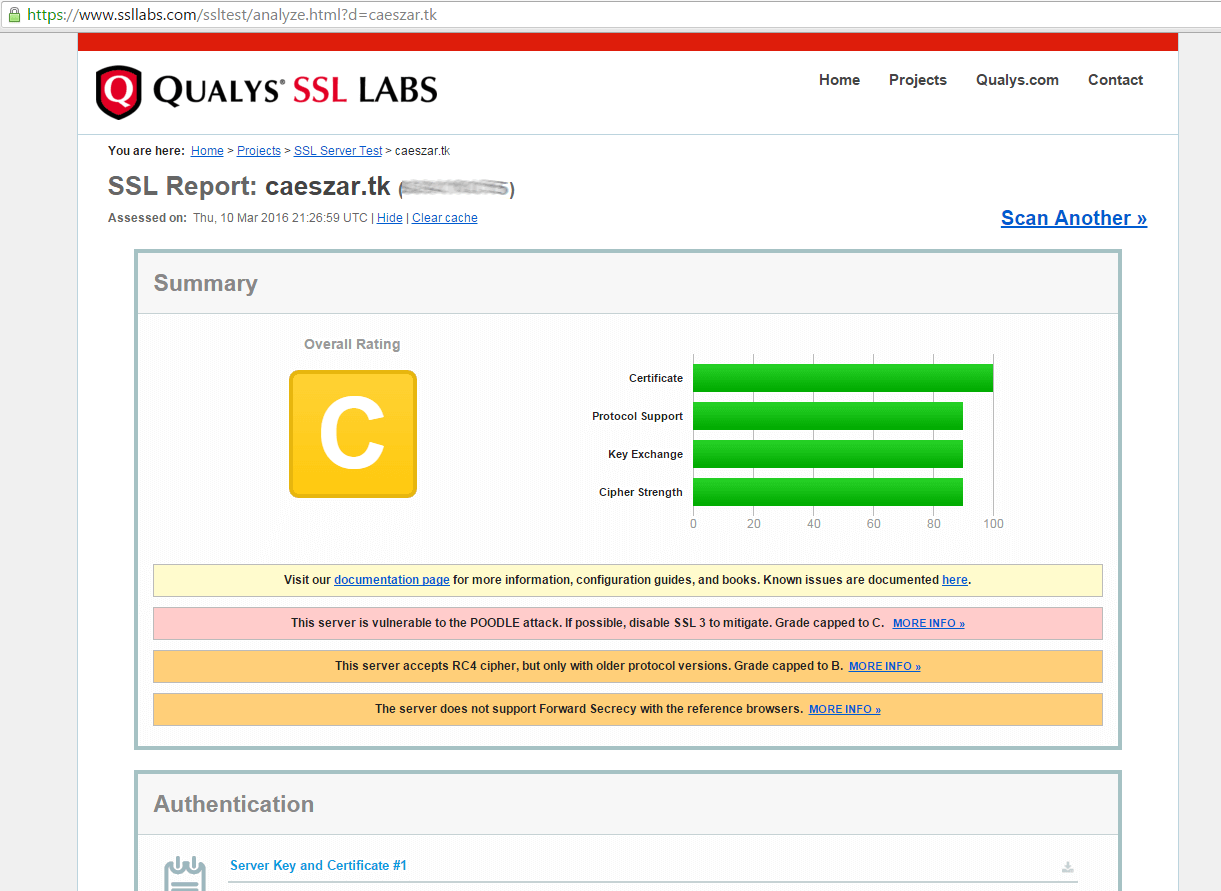
13. In order to test the straightness of your domain SSL/TLS handshake visit the below link and test your certificate on your domain.
Verify Lets Encrypt Certificate on Domain
14. If you receive a series of reports concerning your domain vulnerability in the conducted tests, then you need to fix those security holes urgently.
An overall rating of C class makes your domain very insecure. To fix these security problems, open Apache SSL configuration file and make the following changes:
Search for line with
SSLProtocol statement and add -SSLv3 at the end of the line.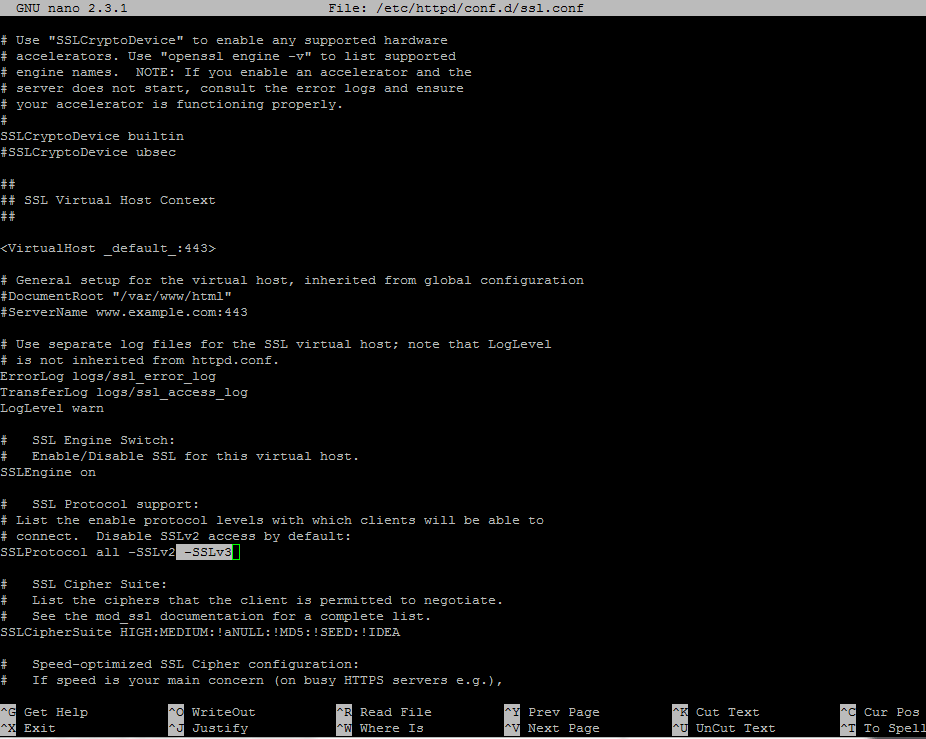
Fix Apache SSL Configuration
Go deeper in the file, search and comment the line with
SSLCipherSuite by placing a # in front of it and add the following content under this line: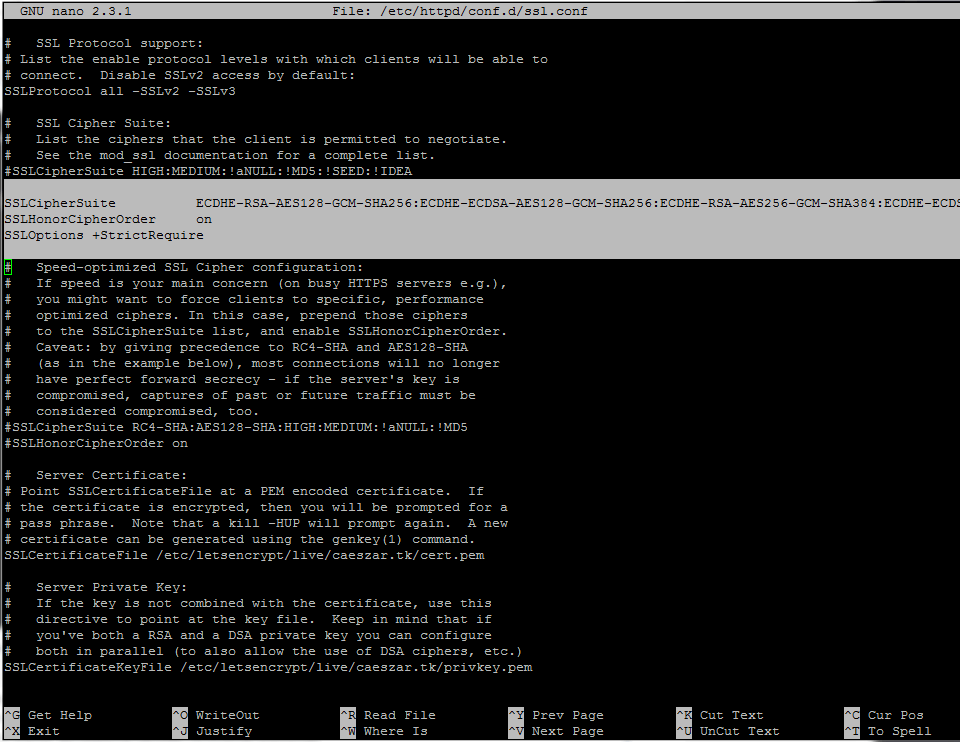
Configure SSL Configuration
15. After you’ve made all the above changes, save and close the file, then restart Apache daemon to apply changes.
16. Now, tests the status of your domain encryption again, by visiting the same link as above. To perform retests hit the Clear cache link from the website.
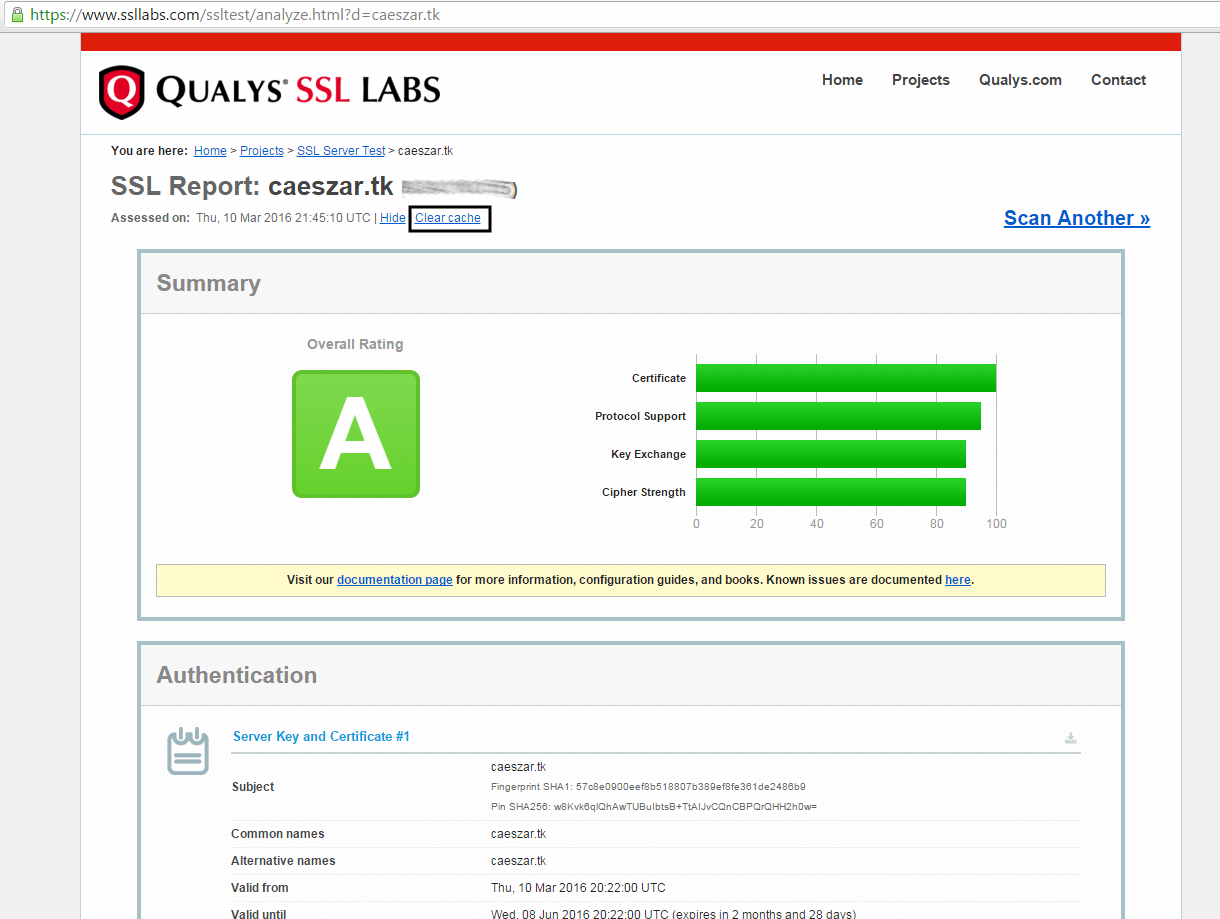
Test Lets Encrypt SSL Certificate on Website
Now you should get a class A overall rating, which means your domain is highly secured.
Step 4: Auto Renew Let’s Encrypt Certificates on Apache
17. This beta version of Let’s Encrypt software releases certificates with expiration date after 90 days. So, in order to renew the SSL certificate, you must execute the
letsencrypt-auto command again before expiration date, with the same options and flags used to obtain the initial certificate.
An example on how to manually renew the certificate is presented below.
18. To automate this process, create the following bash script provided by github erikaheidi, in
/usr/local/bin/ directory with the following content. (the script is slightly modified to reflect our letsencrypt installation directory).
Add the following content to
le-renew-centos file:
19. Grant execution permissions for the script, install bc package and run the script in order to test it. Use your domain name as a positional parameter for the script. Issue the below commands to accomplish this step:
20. Finally, using Linux scheduling, add a new cron job in order to run the script every two months, assuring that your certificate will be updated before expiration date.
Add the following line at the bottom of the file.
That’s it! Your Apache server running on top of CentOS/RHEL system is now serving SSL content using a free Let’s Encrypt SSL certificate.
source: tecmint.com

Comments
Post a Comment